First, I’ve been reading “You Can Grow African Violets” by Kent and Joyce Stork – the “Official Guide Authorized by the African Violet Society of America.”
OK – let me say at the outset i never doubted I could grow African violets – nor do I doubt you can – they’re easy. My Mom grew them on windowsills when I was a kid and I grew them on windowsills and under artificial lights 100 years ago – well, 40 maybe. And I still have my book from those earlier days, “The New Complete Book of African Violets” by Helen Van Pelt Wilson.

My African violet library consists of two books and a few copies of the Bay state African Violet Society newsletter – all very helpful, but none essential.
Ahhhh . .. that name says it all – Helen Van Pelt Wilson – Makes it sound like anyone living in a Newport Mansion could grow African violets! 😉 But seriously, it’s a nice book, but it’s copyright 1951 and some things have changed. My copy is copyright 1963 which is probably closer to when I was growing violets in my last dip into this joyful hobby and it even has a chapter entitled “The Fluorescent Way.” So yes, growing under lights has been part of the scheme for a long time.
In those early days we made a pilgrimage or two, to an African Violet Mecca in eastern Connecticut known as “Buells.” This was a wonderful complex of greenhouses build on several levels on the side of a hill – just a great place to browse on a winter’s day, but sadly now gone. None of which reflect in any negative way on the Stork’s book. I love it. And I find it very, very useful. I just don’t like the title because while it’s intended to ease fears, it might in some people cause the reverse – make it sound like they can be grown, but only after you master the contents of this book. Not so.
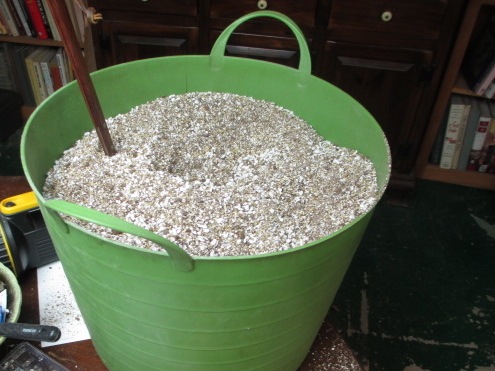
Still, I intend to master the contents of the book and follow the rules I find there, starting with the growing medium – a soilless mixture of one third milled sphagnum moss, one-third vermiculite, and one-third perlite. The idea is to provide something light that won’t compact, will provide air space, but will – thanks to the sphagnum moss – retain a moderate amount of water to keep the roots just the way they like to be kept.
I hope.
But there’s another motor driving things here. with all the young plants generated from leaves during the past few months I have well over 100 african violets and while I enjoy watering each of them and think I’m pretty good at judging when they need a drink, it’s going to get tedious and I really don’t want to burden a neighbor with the task when we take a vacation. So I started with the question of how best to water them and I don’t have the answer yet – just some general directions.
My first venture involves capillary matting. Google that and you’ll find some neat ways to make it on your own, cheap. But I wanted a commercial product that looked like it would take the stress – and I wanted enough of it so that if it gets slimy after a month or two I won’t hesitate to throw it away and try a new piece. My solution was found at Growers Supply. This is not a recommendation. I haven’t used it for any length of time yet. But the service was prompt, the price reasonable for the amount, and the stuff seems tough and soak up water quickly and evenly. There’s a lot of it – 4’x100′ – here’s the roll.
The basic idea is simple. I’m starting with some trays I had on hand with reasonably deep groves in them. You put the ends of the matting int he groves, wet it all down and let extra water sit int he tray. The top of the matting where the plants sit is moist, but only from capillary action – there is no standing water at that level and that’s where you put the plants. You put them on there and top water them once to get the capillary action started. Then you should be able to leave them alone for several days and when it’s time to water you simply fill the tray and let the matting do the work.
I should caution, however, that plants bought at the super market or wherever may be in a heavier mix that will not work well – maybe not work at all – with this system.
I also plan to try another system of wicking. with this you put string like wicks into the plants as you repot with the wick coming out a drainage hole. It can then go to any water source. Same idea. Capillary action does the work – think sponge. Again, there is all sorts of advice about cheap wicking material you probably have around the house. I ordered some stuff that wasn’t very expensive and claims to have a very long life which makes sense to me. Got it on Ebay – here
So that’s the plan. I’ll see what works best for me. I’ll probably make some changes as I go along. I hope I’ll learn more from reading and from doing and from writing about what I’m doing and reading what I write because I’ll surely forget exactly what I did to which plant(s) and when. ;-).
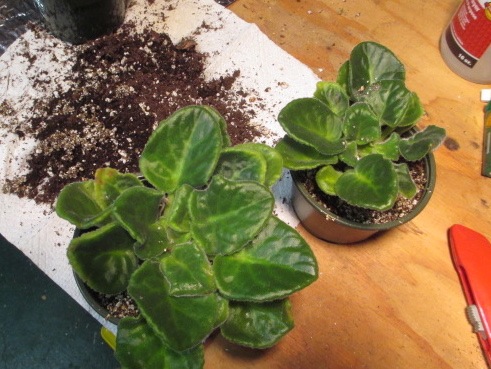
In that respect, here’s my first repot! The two plants below were from the original collection. They were a single plant doing poorly in the winter window and so were among the first plants brought under lights in February. This particular plant – I believe it is a standard – thrived under lights, recovered nicely, but developed a huge sucker almost as large as the main plant. So when I repotted it into the main mix I broke it into two plants.
I started a new labelling system with these. The first one, now 5-inches across, is labelled 7.26.13-1and the second is 7.26.13-2 and is four inches across. I have no name for either.
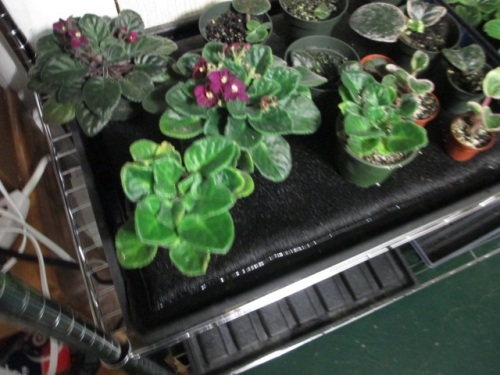
I have put them on the first capillary mat I created using the new matting material and a grooved tray I have from 40 years ago. (I have four of these trays, but one has a crack in it and won’t hold water. Wish I had more – they seem perfect for this task.Here are the plants on the tray.
I actually began this experiment with three smaller trays that I had gotten for seed starting and used this spring. They were promoted as “self-watering” and essentially provided a raised tray with groves and a little capillary mat. Those were started on 7/24 and 7/25. Finally, I took another ordinary tray I had and put four bricks in it, then matting on top – did that on 7/27. On that and the other large, black tray I have some plants placed that do NOT have the proper soil mix. It will be interesting to see if they manage to stay damp as well.
Stay tuned – I will update this!


Leave a comment